The History of Watch Glass and its Evolution in Repair Techniques

Glass replacement on the watch. Village Watch Center

Image Source- Google

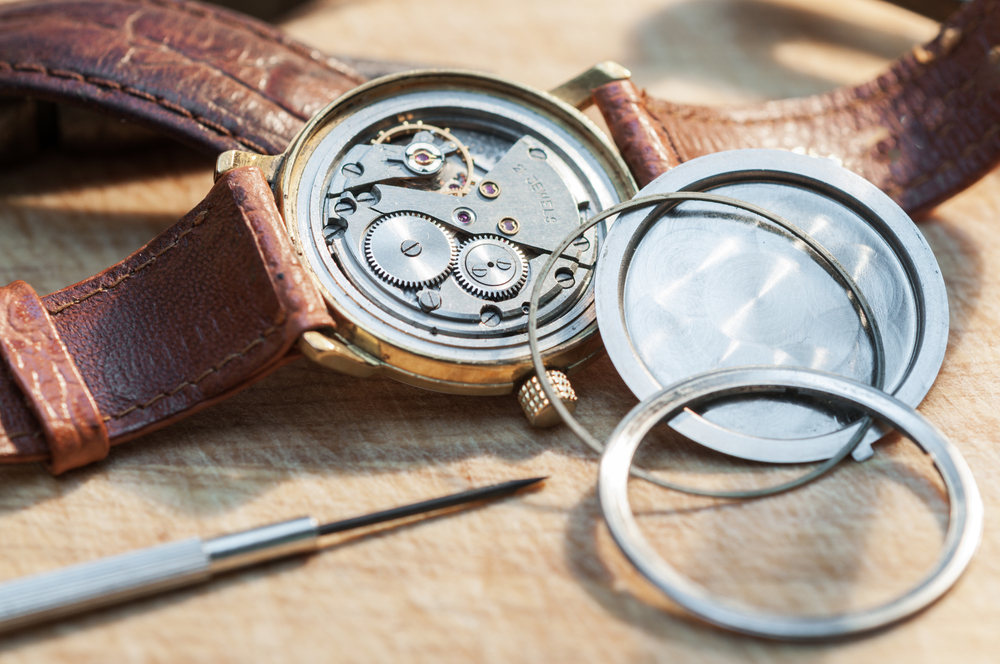
Watches have been a staple accessory for both fashion and function for centuries. Along with the intricate mechanisms that make watches tick, another essential component is the watch glass. The watch glass not only protects the delicate inner workings of a timepiece but also serves as a window to the dial, allowing wearers to tell time easily. You may navigate through this https://watchtechnicians.com/watch-crystal-glass-repair to find the ideal solution for your watch.

Throughout history, watch glass has evolved in both materials and design, leading to innovations in repair techniques to ensure watches remain functional and aesthetically pleasing.

Early History of Watch Glass

Watch glass, also known as the crystal, has been an integral part of watches since their inception. Here are some key points about the early history of watch glass:

  • Early watches used materials like mineral glass, which was prone to scratches and shattering.
  • In the 19th century, the invention of synthetic sapphire and mineral glass revolutionized watchmaking.
  • Sapphire crystal, known for its scratch resistance, became popular in luxury watches.

Materials Used in Watch Glass

Over the years, watchmakers have experimented with various materials for watch glass to improve durability and aesthetics. Here are some common materials used in watch glass:

  • Mineral Glass: Traditional material used in watchmaking, prone to scratches.
  • Sapphire Crystal: Synthetic material known for its scratch resistance and durability.
  • Acrylic: Lightweight and shatter-resistant material often used in vintage and affordable watches.
  • Hardened Glass: Treated mineral glass that is more resistant to scratches and impacts.

Evolution of Repair Techniques

As watches became more sophisticated, so did the techniques used to repair and replace watch glass. Here are some significant milestones in the evolution of repair techniques:

Traditional Glass Replacement

In the past, replacing watch glass was a delicate and time-consuming process that required specialized tools and skills. Watchmakers had to carefully remove the old glass, clean the bezel, and install the new glass without damaging the watch's inner components.

  • Tools such as watchmakers' loupes, tweezers, and case openers were essential for glass replacement.
  • Watchmakers often used pressure-fit or glue to secure the new glass onto the watch case.

Modern Repair Techniques

With advancements in technology and materials, modern repair techniques have made replacing watch glass more efficient and precise. Here are some modern repair techniques used by watchmakers today:

  • Laser Cutting: High-precision laser technology is used to cut custom-sized watch glass for a perfect fit.
  • UV Glue: Specialized UV-activated glue is used to bond the watch glass to the case securely.
  • Waterproofing: Some watches require waterproofing after glass replacement to prevent moisture damage.
  • Pressure Testing: Watches are often pressure tested after glass replacement to ensure they remain water-resistant.

Future Trends in Watch Glass

As technology continues to advance, watchmakers are exploring new materials and techniques for watch glass. Here are some future trends to look out for:

Nanotechnology

Nanotechnology is being used to create ultra-thin, lightweight, and ultra-durable watch glass that is virtually scratch-proof.

Smart Glass

Smart glass technology could revolutionize watchmaking by integrating digital displays and interactive features into the watch glass itself.

Self-Healing Materials

Researchers are developing self-healing materials that could repair minor scratches and dings on watch glass, extending its lifespan.

Eco-Friendly Materials

Watchmakers are exploring eco-friendly materials like recycled glass and bio-based plastics for sustainable watch glass production.

The Ultimate Guide to Successful Weight Loss Clinics

Image Source – Google

Weight loss can be a challenging journey, but with the right support and guidance, it can be achieved successfully. Weight loss clinics offer a structured and supervised approach to help individuals reach their weight loss goals. In this guide, we will explore what makes a weight loss clinic successful and how you can choose the right one for your needs.

What Makes a Weight Loss Clinic Successful?

Qualified Staff

  • Look for clinics that have a team of qualified healthcare professionals, including doctors, dietitians, and fitness trainers.
  • Ensure that the staff members are experienced in helping individuals with weight loss and have the necessary certifications and credentials.

Customized Weight Loss Plans

  • Successful weight loss clinics offer personalized weight loss plans tailored to each individual's unique needs and goals.
  • The plans should take into account factors such as medical history, current health status, dietary preferences, and lifestyle habits.

Comprehensive Support

  • Effective weight loss clinics provide ongoing support and guidance throughout the weight loss journey.
  • This support may include regular check-ins with healthcare professionals, nutrition counseling, fitness classes, and behavioral therapy.

Evidence-Based Practices

  • Look for clinics that use evidence-based practices and follow guidelines set by reputable health organizations.
  • Ensure that the weight loss methods employed by the clinic are safe, sustainable, and backed by scientific research.

How to Choose the Right Weight Loss Clinic

Evaluate the Clinic's Approach

  • Consider whether the clinic's approach aligns with your personal preferences and weight loss goals.
  • Ask about the specific programs and services offered by the clinic, and how they can benefit you in your weight loss journey.

Check the Clinic's Reputation

  • Read reviews and testimonials from previous clients to gauge the clinic's reputation and success rate.
  • Ask for referrals from healthcare providers or friends who have had positive experiences with weight loss clinics.

Assess the Costs and Value

  • Compare the costs of different weight loss clinics and evaluate the value you will receive for the price.
  • Avoid clinics that make unrealistic promises or require long-term financial commitments without delivering results.

Visit the Clinic in Person

  • Schedule a visit to the weight loss clinic to meet the staff, tour the facilities, and ask any questions you may have.
  • Pay attention to the cleanliness of the clinic, the professionalism of the staff, and the overall atmosphere of the environment.

Tips for Success in a Weight Loss Clinic

Set Realistic Goals

  • Work with your healthcare team to set realistic and achievable weight loss goals that align with your overall health objectives.
  • Avoid setting unrealistic expectations or following fad diets that promise quick fixes but are not sustainable in the long run.

Stay Consistent

  • Consistency is key to successful weight loss, so follow your personalized weight loss plan diligently and stick to it over time.
  • Avoid skipping appointments, cheat days, or reverting to old habits that may hinder your progress.

Embrace Lifestyle Changes

  • Focus on adopting healthy lifestyle changes that promote long-term weight management and overall well-being.
  • Incorporate regular physical activity, balanced nutrition, adequate sleep, and stress management techniques into your daily routine.

Celebrate Milestones

  • Recognize and celebrate your achievements along the way, whether it's reaching a weight loss milestone, fitting into smaller clothes, or improving your overall health markers.
  • Reward yourself with non-food treats or activities that motivate you to continue on your weight loss journey.

By following the tips outlined in this guide and choosing a successful weight loss clinic that meets your needs, you can embark on a journey to a healthier and happier you. Remember that weight loss is a gradual process that requires dedication, patience, and support, but with the right resources and mindset, you can achieve your weight loss goals successfully.

Unlocking the Power of Car Charger Grants: A Step-by-Step Guide

Image Source: Google

Electric vehicles (EVs) are becoming increasingly popular as people make the switch to more sustainable transportation options. One of the main challenges for EV owners is access to convenient and reliable charging stations. To address this issue, many organizations offer grants for the installation of car chargers, making it easier for individuals and businesses to adopt EV technology. In this guide, we will walk you through the process of unlocking the power of the best car charger grants step-by-step.

1. Research Available Grants

Where to Find Car Charger Grants:

  • Check with local government agencies: Many cities and states offer grants or incentives for installing EV charging stations.
  • Look for utility programs: Some utility companies provide rebates or funding for EV charger installations to promote energy efficiency.
  • Explore non-profit organizations: Environmental groups and other non-profits may offer grants to support the growth of EV infrastructure.

What to Consider when Researching Grants:

  • Grant amount and eligibility criteria
  • Application process and deadlines
  • Any additional requirements or restrictions

2. Determine Your Charging Needs

Factors to Consider:

  • Number of EVs you own or plan to own
  • Charging location (home, workplace, public area)
  • Charging speed and compatibility with your vehicle
  • Budget for installation and maintenance

Types of EV Charging Stations:

  • Level 1: Standard 120-volt wall outlet charger
  • Level 2: 240-volt charger for faster charging
  • DC Fast Charging: High-powered charger for quick charging on the go

3. Prepare Your Grant Application

Documentation Needed:

  • Proof of ownership or authorization for charger installation
  • Site assessment and proposed charging station location
  • Cost estimates for equipment and installation
  • Evidence of local zoning and building code compliance

Tips for a Successful Application:

  • Follow all instructions and provide requested information accurately
  • Include a detailed project plan and timeline
  • Highlight the environmental and community benefits of the project
  • Seek support from local stakeholders or community partners

4. Submit Your Grant Application

Key Steps:

  • Review the application for completeness and accuracy
  • Submit the application before the deadline
  • Keep copies of all submitted documents for your records

Follow-Up Actions:

  • Respond promptly to any requests for additional information
  • Attend any required meetings or presentations related to your application
  • Stay informed about the status of your application and be prepared to address any feedback or questions

5. Install and Maintain Your Charging Station

Installation Process:

  • Hire a qualified electrician to install the charging station
  • Ensure compliance with all safety regulations and building codes
  • Test the charger to verify proper functionality before regular use

Maintenance Tips:

  • Regularly inspect the charging station for any signs of damage or wear
  • Clean the charging connectors and cables to ensure efficient charging
  • Update any software or firmware as needed for optimal performance

By following this step-by-step guide, you can successfully unlock the power of car charger grants and contribute to the growth of EV infrastructure in your community. Investing in EV charging stations not only benefits the environment but also promotes sustainability and innovation in transportation.

From Chaos to Clarity: How an Expense Management Tool Can Transform Your Financial Life

Managing expenses can often feel like navigating through a chaotic storm of receipts, bills, and financial documents. Keeping track of where your money is going, making sure you stay within budget, and maintaining financial clarity can be overwhelming. However, with the help of an expense management tool, you can streamline the process, gain control over your finances, and transform the way you manage your money.

The Benefits of Using an Expense Management Tool

1. Organized Financial Information

  • An expense management tool allows you to consolidate all your financial information in one place.
  • You can easily categorize expenses, track spending patterns, and identify areas where you may be overspending.
  • Having all your financial data organized can help you make informed decisions about your money.

2. Budgeting Made Easy

  • With an expense management tool, you can set up budgets for different categories such as groceries, utilities, entertainment, and more.
  • The tool can alert you when you are approaching or exceeding your budget in a specific category.
  • By having a clear view of your budget and spending, you can make adjustments as needed to stay on track financially.

3. Tracking Expenses on the Go

  • Many expense management tools offer mobile apps that allow you to track your expenses on the go.
  • You can easily snap photos of receipts, record expenses in real-time, and access your financial data from anywhere.
  • This feature is especially handy for those who are constantly on the move or travel frequently.

How to Choose the Right Expense Management Tool

1. User-Friendly Interface

  • Look for an expense management tool with an intuitive and user-friendly interface.
  • The tool should be easy to navigate and should not require a steep learning curve.
  • Consider trying out a demo or free trial version before committing to a tool.

2. Integration with Financial Institutions

  • Choose a tool that can seamlessly integrate with your bank accounts, credit cards, and other financial institutions.
  • This integration can save you time by automatically importing transactions and updating your financial data.
  • Make sure the tool uses secure encryption to protect your sensitive financial information.

3. Customization Features

  • Look for an expense management tool that allows you to customize categories, labels, and budgets to fit your specific financial needs.
  • Customization features can help you track expenses more accurately and make the tool more personalized to your financial goals.
  • Consider if the tool offers any additional features such as bill reminders, recurring expense tracking, or financial reports.

Tips for Success with an Expense Management Tool

1. Consistently Track Your Expenses

  • Make it a habit to track your expenses regularly, whether it's daily, weekly, or monthly.
  • Consistent tracking will give you a clear picture of where your money is going and help you identify any spending patterns.
  • Set aside dedicated time in your schedule to update your expense management tool and review your financial data.

2. Review and Analyze Your Financial Data

  • Take the time to review and analyze the reports and insights provided by your expense management tool.
  • Look for areas where you can cut back on expenses, identify trends in your spending behavior, and set new financial goals.
  • Regularly monitoring your financial data can help you make informed decisions about your money and stay on top of your financial health.

3. Adjust and Fine-Tune Your Budget

  • Use the insights from your expense management tool to adjust and fine-tune your budget as needed.
  • If you notice that you are consistently overspending in a particular category, consider reallocating funds from other areas or finding ways to reduce expenses.
  • Your budget should be flexible and adaptable to changes in your financial situation or goals.

By incorporating an expense management tool into your financial routine, you can transform chaos into clarity and take control of your financial life. With organized financial information, easy budgeting, and the ability to track expenses on the go, you can make smarter financial decisions and work towards achieving your financial goals.

Hidden Gems: Uncovering the Best Cigar Shops in Your City

Are you a cigar aficionado looking to discover new and unique cigar shops in your city? While some cigar enthusiasts may rely on well-known chain retailers, there are often hidden gems waiting to be uncovered. From cozy family-owned establishments to upscale cigar lounges, exploring the lesser-known cigar shops in your area can lead to delightful surprises. In this article, we will guide you on how to uncover the best cigar shops in your city and what to look for in these hidden gems.

Exploring Local Favorites

Ask for Recommendations

  • Reach out to fellow cigar enthusiasts or join online forums to ask for recommendations on lesser-known cigar shops in the area.
  • Local cigar clubs or events can also be a great place to network and discover hidden gems.

Visit Neighborhoods Off the Beaten Path

  • Explore different neighborhoods in your city, especially those off the beaten path, to uncover unique and hidden cigar shops.
  • Local shops tucked away in quieter areas often have a charm and character that can enhance your cigar shopping experience.

What to Look for in a Hidden Gem Cigar Shop

Unique Selection of Cigars

  • A hidden gem cigar shop should offer a diverse and unique selection of cigars, including rare and boutique brands.
  • Look for shops that carry a variety of blends, sizes, and regions to cater to different preferences.

Knowledgeable Staff

  • The staff at a hidden gem cigar shop should be knowledgeable about their products and able to provide recommendations based on your preferences.
  • Look for shops where the staff are friendly, approachable, and passionate about cigars.

Comfortable Atmosphere

  • A welcoming and comfortable atmosphere is essential for a relaxing cigar-shopping experience.
  • Look for shops with cozy seating areas, proper ventilation, and perhaps even a designated smoking lounge.

Top Hidden Gem Cigar Shops in Your City

Name of Cigar Shop 1

  • Located in the Neighborhood, Name of Cigar Shop 1 is a hidden gem known for its exceptional selection of rare and boutique cigars.
  • The staff are friendly and knowledgeable, creating a welcoming atmosphere for both seasoned aficionados and beginners.
  • Be sure to check out their cozy smoking lounge, where you can enjoy your favorite cigar in comfort.
  • Nestled in the heart of is a hidden gem beloved by locals for its curated collection of premium cigars.
  • The shop's owner is passionate about cigars and always willing to share recommendations and stories with customers.
  • Visit for a personalized and memorable cigar shopping experience.

Supporting Local Businesses

Exploring hidden gem cigar shops in your city is not only a way to discover new and unique cigars but also a way to support local businesses. By shopping at smaller, independent cigar shops, you are contributing to the local economy and helping to preserve the diversity of cigar culture in your area. So next time you're in the mood for a new cigar, consider venturing off the beaten path to uncover the hidden gems waiting to be discovered in your city.

The Ultimate Guide to Choosing the Perfect Stone Flooring for Your Kitchen

Image Source: Google

Choosing the right flooring for your kitchen is crucial as it not only enhances the aesthetic appeal of the space but also adds to its functionality and durability. Stone flooring is a popular choice for kitchens due to its durability, timeless appeal, and natural beauty. However, with so many options available, selecting the perfect stone flooring for your kitchen can be overwhelming. This ultimate guide will help you navigate through the different types of stone floorings for kitchen options and choose the one that best suits your needs and style.

Types of Stone Flooring

1. Granite

  • Durable and scratch-resistant
  • Heat-resistant, making it ideal for kitchen use
  • Available in a wide range of colors and patterns

2. Marble

  • Elegant and luxurious appearance
  • Requires regular sealing to prevent staining
  • Available in various colors and veining patterns

3. Slate

  • Natural, rustic look
  • Durable and water-resistant
  • Comes in a range of earthy tones

4. Limestone

  • Soft and warm appearance
  • Requires regular maintenance to prevent scratching and staining
  • Available in shades of beige, cream, and gray

Factors to Consider

1. Durability

Since the kitchen is a high-traffic area prone to spills and heavy use, durability is a key factor to consider when choosing stone flooring.

2. Maintenance

Some stone types require more maintenance than others. Consider how much time you are willing to spend on cleaning and maintenance.

3. Style and Aesthetic

Choose a stone that complements the overall style of your kitchen and reflects your personal taste and aesthetic preferences.

4. Budget

Stone flooring can vary significantly in price, so it's essential to set a budget and choose a stone that fits within your financial constraints.

Choosing the Perfect Stone Flooring

1. Assess Your Needs

Consider your lifestyle, cooking habits, and how much time you can dedicate to maintenance to determine the best stone flooring for your kitchen.

2. Sample Different Stones

Visit stone suppliers or showrooms to see and feel different stone options in person. Take samples home to see how they look in your kitchen's lighting.

3. Consult with Professionals

Seek advice from interior designers or flooring experts to help you make an informed decision based on your specific requirements and budget.

4. Consider Long-Term Value

Invest in quality stone flooring that will stand the test of time and add value to your home in the long run.

Maintenance Tips

1. Regular Cleaning

  • Sweep or vacuum the floor regularly to remove dust and debris.
  • Mop with a pH-neutral cleaner and warm water to keep the stone looking its best.

2. Sealing

  • Depending on the type of stone, consider sealing it periodically to protect it from stains and spills.
  • Follow the manufacturer's guidelines for sealing frequency.

3. Preventing Damage

  • Use coasters under glasses and mats under heavy furniture to prevent scratches and dents.
  • Wipe up spills immediately to avoid staining the stone.

Conclusion

Choosing the perfect stone flooring for your kitchen involves careful consideration of factors such as durability, maintenance, style, and budget. By following this ultimate guide and taking the time to explore different stone options, you can select a flooring material that not only enhances the beauty of your kitchen but also withstands the demands of daily use. Remember to prioritize quality and long-term value when making your decision, and enjoy the timeless elegance that stone flooring brings to your kitchen.

Sophisticated Glamour: Cushion Cut Halo Diamond Ring Trends

rings

When it comes to engagement rings, the cushion cut halo diamond ring has been steadily gaining popularity for its timeless elegance and sophisticated glamour. This classic yet modern style combines the vintage charm of a cushion-cut diamond with the added sparkle of a halo setting, creating a ring that exudes luxury and romance. In this article, we will explore the latest trends in cushion cut halo diamond rings, from design features to styling tips.

Design Features of Cushion Cut Halo Diamond Rings

Cushion Cut Diamonds

  • Cushion cut diamonds feature a square or rectangular shape with rounded corners, resembling a pillow or cushion.
  • These diamonds are prized for their brilliance and fire, making them a popular choice for engagement rings.

Halo Setting

  • The halo setting consists of small diamonds or gemstones encircling the center diamond, enhancing its sparkle and making it appear larger.
  • This setting adds a glamorous and luxurious touch to the ring, giving it a dazzling effect.

Trending Styles in Cushion Cut Halo Diamond Rings

Rose Gold Bands

  • Rose gold bands have become increasingly popular for cushion cut halo diamond rings, adding a romantic and feminine touch to the design.
  • The warm hue of rose gold complements the brilliance of the diamonds, creating a stunning contrast.

Double Halo Designs

  • Double halo designs feature two rows of smaller diamonds encircling the center stone, creating a more opulent and extravagant look.
  • This style offers added sparkle and dimension to the ring, making it a show-stopping piece.

Styling Tips for Cushion Cut Halo Diamond Rings

Pair with Simple Wedding Bands

  • To let the cushion cut halo diamond ring shine, opt for a simple and understated wedding band that complements rather than competes with the engagement ring.
  • A plain metal band or a delicate diamond-studded band can beautifully complement the elaborate design of the halo ring.

Mix and Match with Stackable Rings

  • Create a unique and personalized look by mixing and matching your cushion cut halo diamond ring with stackable bands in different metals and styles.
  • Stacking rings allows you to create a customized bridal set that reflects your individual style and personality.

Consider Vintage-Inspired Wedding Attire

  • For a cohesive and elegant look, consider incorporating vintage-inspired elements into your wedding attire to complement the timeless glamour of a cushion cut halo diamond ring.
  • Opt for lace, satin, or embellished fabrics that evoke a sense of old-world charm and sophistication.

Clear Bra 101: Everything You Need to Know about Paint Protection Film

Protecting your car's paint job is important to maintain its appearance and value. One popular method of doing this is by using paint protection film, commonly known as a clear bra. This transparent film is applied to the exterior of the vehicle to shield it from road debris, scratches, and other forms of damage. If you're considering investing in paint protection film for your vehicle, this guide will provide you with everything you need to know about clear bras.

Luxury Auto Body Shop Long Island NYC

What is Paint Protection Film?

Paint protection film is a thin, clear urethane film that is applied to the painted surfaces of a vehicle. It acts as a protective barrier between the paint and the elements, preventing damage such as stone chips, bug splatter, and minor abrasions. The film is virtually invisible once applied, allowing the original paint color and finish to shine through.

Benefits of Paint Protection Film

  • Prevents stone chips, scratches, and swirl marks
  • Protects the paint from UV rays and oxidation
  • Preserves the resale value of the vehicle
  • Easy to clean and maintain
  • Durable and long-lasting

Types of Paint Protection Film

There are two main types of paint protection film available:

  • Clear Film: This is the most common type of paint protection film, offering a nearly invisible layer of protection for the vehicle's paint.
  • Matte Film: Matte paint protection film provides a matte finish to the vehicle's paint, giving it a unique look while still providing protection.

Installation Process

The installation of paint protection film should be done by a professional to ensure a proper fit and finish. The process typically involves the following steps:

  • Clean the vehicle's exterior to remove any dirt, wax, or other contaminants.
  • Pre-cut the film to fit the specific make and model of the vehicle.
  • Apply the film to the painted surfaces, using a squeegee to remove any air bubbles.
  • Trim the edges of the film for a precise fit.
  • Cure the film with heat to ensure adhesion to the paint.

After the installation is complete, it is important to follow any care instructions provided by the installer to ensure the longevity of the paint protection film.

Maintenance and Care

While paint protection film is designed to be durable and long-lasting, proper maintenance is key to ensuring its effectiveness. Here are some tips for maintaining your clear bra:

  • Regularly wash the vehicle to remove dirt, dust, and other debris that can accumulate on the film.
  • Avoid using harsh chemicals or abrasive cleaners that can damage the film.
  • Use a microfiber cloth or sponge to gently clean the film and avoid scratching the surface.
  • Avoid parking the vehicle in direct sunlight for extended periods, as UV rays can degrade the film over time.
  • Inspect the film regularly for any signs of damage or peeling, and have it repaired or replaced as needed.

Cost of Paint Protection Film

The cost of paint protection film can vary depending on the size of the vehicle, the type of film used, and the complexity of the installation. On average, the cost of applying paint protection film to a vehicle ranges from $500 to $2500. While this initial investment may seem high, it can save you money in the long run by preserving the appearance and value of your vehicle.

Conclusion

Paint protection film, or clear bra, is an effective way to protect your vehicle's paint from damage and maintain its beauty. By understanding the benefits, types, installation process, maintenance requirements, and cost associated with paint protection film, you can make an informed decision about whether it is the right choice for your vehicle. Investing in a clear bra can provide peace of mind knowing that your vehicle is protected for years to come.

Choosing the Best Liquid Probiotic for Gut Health: A Comprehensive Review

Image Source – Google

In recent years, the importance of gut health has gained significant attention due to its impact on overall well-being. One way to support a healthy gut is by incorporating probiotics into your daily routine. Probiotics are beneficial bacteria that promote a balanced gut microbiome, which can help improve digestion, boost the immune system, and even enhance mental health.

While there are many forms of probiotics available, liquid probiotics are gaining popularity for their ease of consumption and quick absorption. If you're looking to choose the best liquid probiotic for gut health then you can buy the best liquid probiotic via this website. this comprehensive review will help you make an informed decision.

Benefits of Liquid Probiotics

Liquid probiotics offer several advantages over other forms, such as capsules or powders. Here are some benefits of liquid probiotics:

  • Fast absorption: Liquid probiotics are easily absorbed by the body, allowing the beneficial bacteria to reach the gut more quickly.
  • Convenience: Liquid probiotics are easy to take and can be added to drinks or taken directly without the need for water.
  • Potency: Liquid probiotics tend to have higher concentrations of live bacteria compared to other forms, ensuring maximum effectiveness.
  • Versatility: Liquid probiotics can be easily mixed into smoothies, juices, or even used in cooking, making it convenient for daily consumption.

Factors to Consider When Choosing a Liquid Probiotic

When selecting a liquid probiotic for gut health, there are several factors to keep in mind. Here are some key considerations:

Strain Diversity

Look for a liquid probiotic that contains a variety of strains to promote a diverse microbiome. Different strains offer unique benefits and can target specific gut issues.

CFU Count

Check the colony-forming units (CFU) count to ensure that the probiotic is potent enough to be effective. A higher CFU count indicates a more powerful probiotic.

Ingredients

Read the ingredient list carefully to avoid any unnecessary additives or allergens. Choose a probiotic with clean, high-quality ingredients.

Refrigeration

Some liquid probiotics require refrigeration to maintain their potency. Consider how you plan to store and use the probiotic when making your selection.

Top Liquid Probiotics for Gut Health

1. Bio-Kult Advanced Multi-Strain Formula

  • Contains 14 different strains of probiotics for optimal gut health.
  • Each capsule delivers 2 billion CFUs of live bacteria.
  • Does not require refrigeration, making it convenient for travel.
  • Free from GMOs, soy, gluten, and artificial colors.

2. MaryRuth's Liquid Probiotic

  • Formulated with 12 probiotic strains to support digestive balance.
  • Includes prebiotics to nourish the probiotics and enhance their effectiveness.
  • Non-GMO, vegan, and free from gluten and soy.
  • Comes in a convenient liquid form for easy absorption.

3. Renew Life Adult Probiotic Supplement

  • Contains 12 probiotic strains to promote gut health and immune function.
  • Delivers 50 billion CFUs per serving for maximum potency.
  • Delayed-release capsules ensure the probiotics reach the intestines intact.
  • Free from gluten, dairy, and soy.

Tips for Incorporating Liquid Probiotics Into Your Routine

To reap the benefits of liquid probiotics, consider the following tips for incorporating them into your daily routine:

  • Start with a low dose and gradually increase to allow your body to adjust.
  • Take the probiotics on an empty stomach for optimal absorption.
  • Be consistent with your probiotic regimen to maintain a healthy gut microbiome.
  • Experiment with different brands and strains to find the one that works best for you.
  • Consult with a healthcare provider before starting any new supplement regimen, especially if you have underlying health conditions.

Conclusion

Choosing the best liquid probiotic for gut health is essential for supporting a balanced microbiome and overall well-being. Consider the strain diversity, CFU count, ingredients, and storage requirements when selecting a liquid probiotic. Incorporating a high-quality liquid probiotic into your daily routine can help improve digestion, boost immunity, and promote optimal gut health. With the right choice, you can take a proactive approach to supporting your gut health and overall wellness.

Prank Like a Pro: Using Fake Proof of Pregnancy Paper to Fool Your Friends

Pranking your friends can be a fun way to create memorable moments and share a good laugh. One popular prank that never fails to get a reaction is the fake proof of pregnancy prank. By using fake pregnancy papers, you can fool your friends into believing that you are expecting a baby, leading to hilarious and sometimes priceless reactions. In this article, we will explore how you can prank like a pro by using fake proof of pregnancy paper to fool your friends.

Getting Started with the Prank

Things You Will Need:

  • Fake proof of pregnancy papers
  • Printer and paper
  • Scissors
  • Envelope
  • Marker or pen

Creating the Fake Proof of Pregnancy Paper:

Follow these steps to create a convincing fake proof of pregnancy paper:

  1. Find a template online or create your own design for the pregnancy papers.
  2. Fill in the necessary information such as your name, doctor's name, due date, and ultrasound details.
  3. Print the design on a piece of paper and cut it to the appropriate size.
  4. Fold the paper neatly and place it inside an envelope.
  5. Address the envelope to your friend and seal it with a kiss or a fake doctor's stamp for added authenticity.

Executing the Prank

Choosing the Right Moment:

Timing is crucial when it comes to executing a successful prank. Choose a moment when your friend is relaxed and not expecting any surprises.

Revealing the Fake Proof of Pregnancy Paper:

Here's how you can reveal the fake proof of pregnancy paper to your friend:

  1. Nonchalantly hand over the envelope to your friend and watch their reaction as they open it.
  2. Observe their initial shock and disbelief as they read the contents of the paper.
  3. Wait for the moment of realization to sink in before revealing the prank and sharing a good laugh together.

Handling Reactions and Follow-Up

Reacting to Different Responses:

Depending on your friend's reaction, here are some ways you can handle the aftermath of the prank:

  • If your friend is initially shocked or upset, quickly reveal the prank and assure them that it was all in good fun.
  • If your friend laughs along with the prank, enjoy the moment and share a laugh together.
  • Be prepared for various reactions and respond accordingly to ensure that the prank remains light-hearted and enjoyable for everyone.

Explaining the Prank:

After revealing the truth behind the fake proof of pregnancy paper, take the time to explain the prank to your friend:

  • Share the process of creating the fake pregnancy papers and the effort put into making the prank convincing.
  • Reassure your friend that the prank was done with good intentions and meant to create a memorable moment between the two of you.
  • Avoid pranking others who may not appreciate such jokes and always prioritize your friend's feelings and reactions.

Conclusion

Pranking like a pro requires creativity, timing, and a good sense of humor. By using fake proof of pregnancy paper, you can pull off a hilarious and memorable prank on your friends, leading to laughter and shared moments. Remember to always consider your friend's feelings and reactions when executing pranks and ensure that the joke is in good fun. So, gather your materials, plan your moment, and get ready to prank like a pro with fake proof of pregnancy paper!