A dryer box is an essential component of any laundry system, and installing one can make a huge difference to the efficiency of the dryer.
Here are the steps to help you install a plastic dryer box with ease:
Plan The Location: Take some time to plan the location of the dryer box. It should be placed close to the dryer and in a space that allows easy access to the dryer vent. If you are looking for the best quality plastic dryer vent box, you can search online.
Choose The Right Box: Choose a plastic dryer box that is large enough to accommodate the size of the dryer vent. Make sure that the box is made from durable plastic and is designed to withstand high temperatures.
Gather The Necessary Tools: Gather the necessary tools for installation. This includes a drill, a screwdriver, a level, and a hacksaw. Additionally, you will need some screws, a mounting bracket, and a tube of sealant.
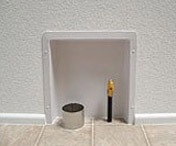
Attach The Dryer Box: Attach the plastic dryer box to the mounting bracket, making sure that it is securely fastened.
Secure The Vent: Secure the vent to the wall and to the dryer box using the screws. Make sure that the vent is firmly in place.
Test The Installation: Finally, turn on the dryer to test the installation. Make sure that there are no air leaks and that the dryer is working correctly.